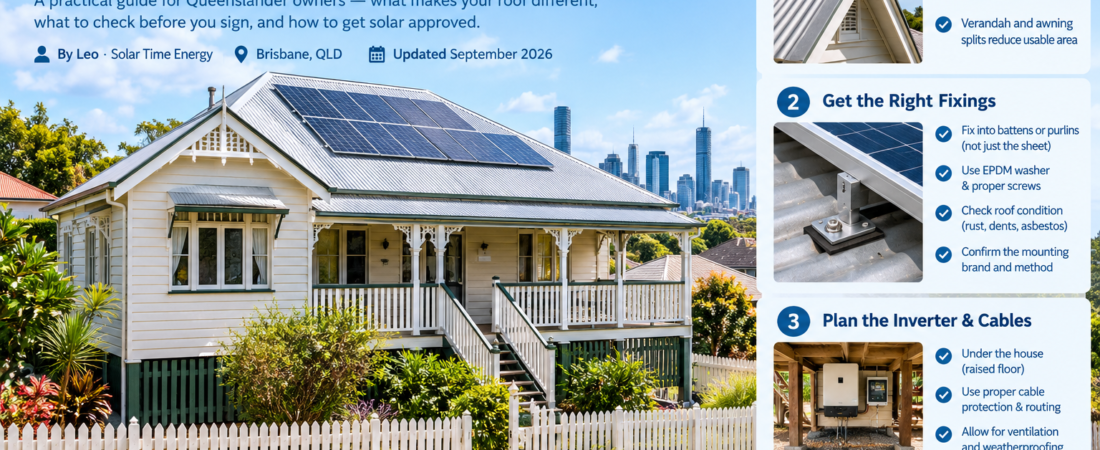
Solar Panels for Queenslander Homes: Raised Floors, Tin Roofs & Character Overlays
By Leo · Solar Time Energy · Brisbane, QLD · Updated September 2026
The Queenslander is the defining Brisbane home — timber-framed, raised on stumps, wrapped in verandahs, and capped with a corrugated iron roof that has survived a century of storms. It’s also one of the trickiest roof types in Australia to put solar on. Most national solar content pretends every roof is a flat tile plane on a slab. In suburbs like Windsor Paddington Ascot Wilston Red Hill, that advice simply doesn’t apply.
This guide is a practical checklist for Queenslander owners: what makes your roof different, what to check before signing a contract, and how to get solar approved when your street sits under a character overlay.
Bottom line up front: Queenslander homes can absolutely take solar — and often generate brilliantly thanks to steep, sun-catching roof pitches. But they need an installer who understands corrugated iron fixings, subfloor cable routes, and Brisbane City Council’s Traditional Building Character Overlay. If your installer quotes you over the phone without a roof inspection, walk away.
1. Your Roof Is Smaller Than It Looks
A Queenslander roof looks generous from the street. On paper it usually isn’t. Three things quietly eat your usable area:
- Corrugated iron on a steep pitch. Classic Queenslander roofs run 25°–35° or steeper. Great for drainage, great for self-cleaning panels — but it makes roof walking and panel placement slower and more safety-intensive, which affects installation cost.
- Verandah and awning splits. Every verandah roof, hip, and valley chops one big roof plane into several small ones. Panels need clear setbacks from ridges, valleys, and edges, so each small plane fits fewer panels than the raw area suggests.
- Multiple orientations. A typical Queenslander presents 4–6 roof faces instead of 2. The good news: with modern inverters and panel-level optimisation, a split east/west array often outperforms one big northern array for household self-consumption.
Pre-quote checklist — roof area
- Count the actual usable roof planes (excluding verandah roofs narrower than ~3 rows of panels).
- Identify the north and west faces — these carry your peak generation.
- Check for valley gutters and box gutters: panels can’t overhang them, and leaf debris from steep iron roofs accumulates fast.
- Ask how many panels fit on each plane at the correct setback (typically 300–500 mm from edges and ridges).
- If shading from chimneys, ridge vents, or neighbouring houses is an issue, insist on panel-level optimisation or micro-inverters.
Steep-roof warning: anything over ~20° pitch legally requires additional fall-arrest and scaffold measures under WHS rules. A quote that ignores this is a quote that gets “revised” on installation day.
2. Corrugated Iron: The Right Fixings Matter
Tin roofs aren’t harder to mount solar on — they’re different. Get the fixing wrong and you get roof leaks two winters later, which on a heritage home is a much bigger problem than an ugly panel.
- Rail must fix into roof battens or purlins, not just the sheet. Corrugated iron alone cannot carry panel load — the L-feet must land on timber battens or steel purlins beneath.
- Use the correct roof sheet screw with an EPDM washer, sealed and torqued properly — over-tightening dimples the sheet and creates a future leak point.
- Check the sheet condition first. Rust around existing fixing holes, flaking galvanising, or dented sheets may mean replacing sections before panels go on. Panels last 25+ years; do the roof work before, not after.
- Confirm the roof is not asbestos (super-six) lookalike material — common on older outbuildings and some verandah linings. This needs testing before anyone drills.
- Ask your installer which mounting brand and fixing method they use on corrugated iron — a confident answer names the product; a vague answer is a red flag.
3. The Raised Floor: Where the Inverter and Cables Actually Go
This is the part almost no generic solar guide covers, and it’s the single biggest difference between a Queenslander install and a slab-home install.
On a slab home, cable runs and the inverter live conveniently at ground level. On a Queenslander, your options are:
| Option | Pros | Cons / Things to Check |
|---|---|---|
| Inverter on external wall (under the house or on a stump-line wall) | Shortest DC run from roof; easy access for servicing; keeps heat off the roof space | Must be shaded from western sun; check subfloor clearance height for safe access; inverter needs ventilation clearance (usually 200–300 mm around) |
| Inverter in the subfloor | Invisible from the street — a real advantage under character overlay; cool in summer | Must NOT be in a flood-prone subfloor (check Brisbane flood maps for your address); needs adequate airflow and clearance; technician access for servicing must be safe |
| Cable route through subfloor | Cleanest appearance; no conduit running down facade walls | Subfloor must be accessible and dry; cables need proper clips/supports, not draped on stumps; longer runs may need larger cable size (cost) |
| External conduit down the facade | Cheapest and simplest | Visible conduit on a beautifully restored facade — under character overlay this can attract objections; ask for painted/discreet conduit routing |
Pre-quote checklist — raised floor routing
- Walk your subfloor before the site visit: note headroom, drainage, damp, and any stored materials.
- Check your property on the Brisbane flood overlay — subfloor inverters are a no-go in flood-affected zones.
- Ask where the inverter will be mounted and whether the position gets afternoon sun (heat kills inverter lifespan).
- Confirm DC isolator placement — it must be reachable from ground or subfloor access, not requiring a ladder mid-emergency.
- If you’re under character overlay, request the cable route plan in writing before approval is lodged.
4. Old Roof Frames: Rot, Termites & Load Points
Many Brisbane Queenslander roofs are 60–120 years old. Panels plus rails add roughly 10–20 kg per square metre of dead load, plus wind uplift. A sound Queenslander frame handles this fine — but “sound” needs to be verified, not assumed.
Pre-quote checklist — structure
- Professional roof frame inspection before contract signing — not a five-minute look from the manhole. Check for: timber rot around gutters and valleys, previous leak damage, and sagging rafters.
- Termite history. Ask the seller/previous owner and have the installer’s assessor check Roof frame timber. Active termites + added roof load = structural risk that must be treated first.
- Identify load-bearing members: where rafters meet the top plates, and where the frame transfers load down through the stumps. Mounting rails should align with rafters, never fix to battens alone on old frames.
- Check tie-down and bracing: pre-1960s frames sometimes lack modern cyclone-era tie-downs. Queensland’s wind region requirements still apply in Brisbane (Region B/C boundaries matter for outer suburbs).
- If the frame needs sistering or reinforcement, do it before installation — it’s cheap carpentry before panels, and an expensive panel-removal job after.
Good news: a steep 30° Queenslander pitch with a healthy frame is one of the best solar profiles in Queensland — better sun angle in winter, self-cleaning in rain, and panel output that beats flat tile roofs by a noticeable margin.
5. Character Overlay & Heritage: Getting Approval Without the Headache
Large parts of Windsor, Paddington, Ascot, Wilston, Red Hill, Newmarket and Kelvin Grove sit under Brisbane City Council’s Traditional Building Character Overlay (pre-1947 housing). Solar is generally still approvable — but the way it’s installed determines whether you need a full planning application or sail through with none.
What the overlay typically expects
- Mount on the rear roof plane (the face least visible from the street) where generation allows.
- Low-profile or flush-mounted rails — no tilt frames sticking up over the ridgeline.
- Dark or black-framed panels with black backing to blend with the iron roof; silver-framed panels are the most common reason applications attract objections.
- Invisible cabling — route conduit through the subfloor or rear facade, not down the front verandah.
- Panels should not extend above the ridge line or dominate the primary street facade.
Pre-quote checklist — character overlay
- Check your property on Brisbane City Plan 2014 mapping for “Traditional building character overlay” before you spend money on design.
- Ask whether the installer has lodged character-overlay solar applications in Brisbane before — and ask to see one. Many national franchises have never done one.
- Get the panel layout drawn from the street view, showing the rear-plane placement and black-frame panels.
- Confirm in writing who lodges any development application (if needed), who pays the council fees, and the expected timeline (typically 2–6 weeks).
- If you’re in a state-listed heritage place (rarer — check the Queensland Heritage Register), expect tighter requirements: engage a heritage consultant early.
Common mistake: installing first, approving later. Council can require removal of non-compliant panels, and you’ll pay for the uninstall. In overlay streets, always confirm your approval pathway before the first panel is lifted.
6. What It Costs & What You Should Expect to Pay
Queenslander installs carry a modest premium over slab homes — realistically 10–20% — driven by steep-roof safety equipment, extra roof planes, and longer cable runs. As a September 2026 guide for Brisbane:
- 6.6 kW system (typical Queenslander fit): roughly $5,500–$8,000 installed, after federal STC incentives.
- Adding a battery (e.g. 10 kWh class): from around $8,000–$12,000 after the federal Cheaper Home Batteries Program incentive — a strong option for character-overlay homes where the rear-roof array is smaller, since a battery covers evening use.
- STCs are calculated on system size and zone — Brisbane sits in Zone 3 — and are claimed by the installer as a point-of-sale discount. Any quote should already show the net price.
- Get at least three quotes, and make sure each one includes a physical roof inspection. A phone-only quote for a Queenslander is worthless.
7. The 60-Second Queenslander Solar Checklist
- Roof planes counted, north/west faces identified, valleys and verandahs excluded from panel area
- Corrugated iron condition checked — fixing into battens/purlins with proper sealed screws
- Roof frame professionally inspected for rot, termites, and tie-down adequacy
- Inverter and cable route decided: subfloor vs external wall vs facade conduit
- Flood overlay checked before any subfloor equipment placement
- Character overlay checked on council mapping; rear-plane, black-frame, low-profile design prepared
- Steep-pitch WHS measures included in the quote (scaffold/fall arrest)
- Approval pathway confirmed in writing before installation
Frequently Asked Questions
Can you put solar panels on a corrugated iron Queenslander roof?Do I need council approval for solar under Brisbane’s character overlay?Where should the inverter go on a raised Queenslander home?Will solar damage my old timber roof frame?How many panels fit on a typical Queenslander roof?
Getting Solar on Your Brisbane Queenslander
Solar Time Energy installs solar and battery systems across Brisbane, Gold Coast and Ipswich — including character-overlay suburbs like Windsor, Paddington and Ascot. Every Queenslander job starts with an on-roof inspection and a written cable-routing and panel-layout plan.
📞 Call 1300 712 020 or request a free Queenslander solar assessment → www.solartimeenergy.com.au